This is a comprehensive and simple tutorial to speed up the WordPress website in 3 easy steps. Speed is very important for every website as your Google ranking and the user experience are based on it. According to Google, the website speed greatly impacts your Google rankings, slow websites are penalized in Google rankings. So, it’s important to have a website optimized for speed and performance.
Today I’ll teach you 3 easy steps, by which you can improve your website speed with a load time of less than 3s. Let’s discuss one important factor:
Why it’s important to choose reliable Web Hostings?
It’s necessary to have reliable hosting to start your WordPress website. The initial server response is responsible for your page load speed, the better the initial response, the better will be the speed. So, it’s necessary to choose a very reliable hosting and a server nearer to your customers or visitors.
I can recommend a few Web Hostings i.e Hostinger and Siteground are very reliable hostings which I personally have experienced working with them. Let’s start with our first point
1. Images Optimization (JPG vs PNG)
People ask me, which is the best format to use for the website images, JPG or PNG? Let’s discuss that with some details:
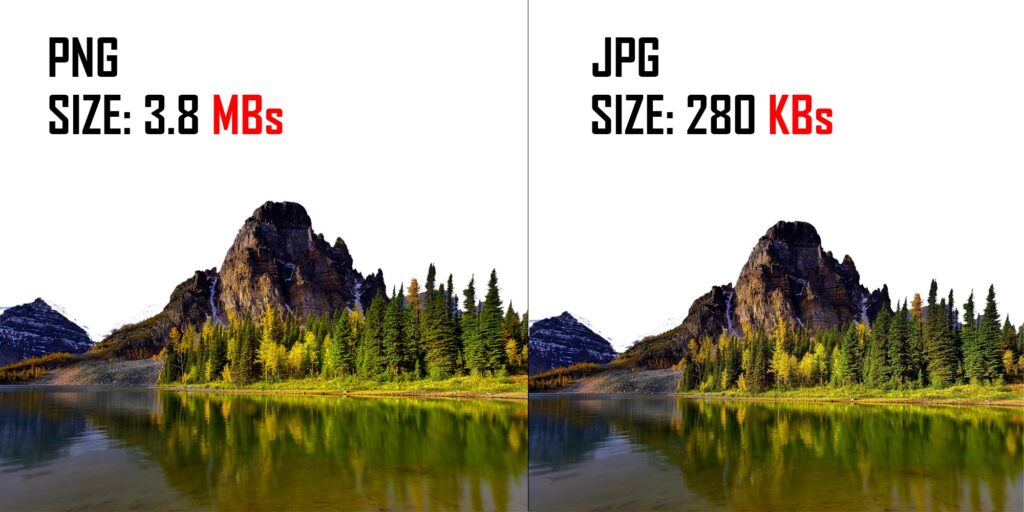
JPG: JPG format is best for your website images i.e website banners, real-time images, the images that have sizes bigger than 1000px. JPG provides the best quality while keeping the file size very low as compared to PNG. PNG provides quality and transparency but with a very large image size.
PNG: PNG format is best suitable for images that need transparency and it supports 16-bit for the best quality of the image. Use this for any artwork like your website logo, icons, illustrations i.e any artwork that is made using Adobe Photoshop, Adobe Illustrator, etc.
So, you must choose the best format for your images before uploading on to your WordPress website. You can use some online tools to compress your images, convert png to jpg and compress your images in bulk.
I recommend Tiny PNG, Bulk JPG Convert and Website Planet to optimize images in bulk.
How to optimize the already uploaded images on your website?
There are many different plugins available on the WordPress plugins directory to optimize and resize the already uploaded images. I recommend the Smush Plugin, it’s one of the popular images optimization plugins and is widely used by many WordPress developers. I have elaborated its installation and necessary settings in my video.
2. Convert website images to WEBP Format
Now while testing your website on different platforms like Google Speed Insights and GT Matrix etc, it recommends you to convert your images into WebP format. So, now you must be thinking:
What is the WebP format for images?
WebP format is developed by Google as a replacement for online web images for JPEG, PNG, and GIF file formats. It provides very small-size images in WebP format while serving equal quality for all images. It’s best to use on websites as it greatly helps in loading images for while keeping the size very low.
There are many plugins that provide this feature of serving your images in WebP format, I recommend the WebP Express plugin which I usually use on my client’s websites. I have elaborated installation and set up this plugin in my youtube video.
3. Minification and Caching
We need to optimize the website code HTML/CSS/Javascript to improve website speed. For this purpose, we use the WP Rocket Plugin to optimize and minify code and enable browser caching and link preloading. I have elaborated on the WP Rocket installation and setup too in my video.
You just need to execute these three steps, it’ll do the rest for your website speed and overall performance.
Tip: Do remember to save your website speed results for Google Speed Insights and GT Matrix before and then compare with the after results. I hope you like this article to speed up the WordPress website 3 easy steps, read more articles on WordPress.


